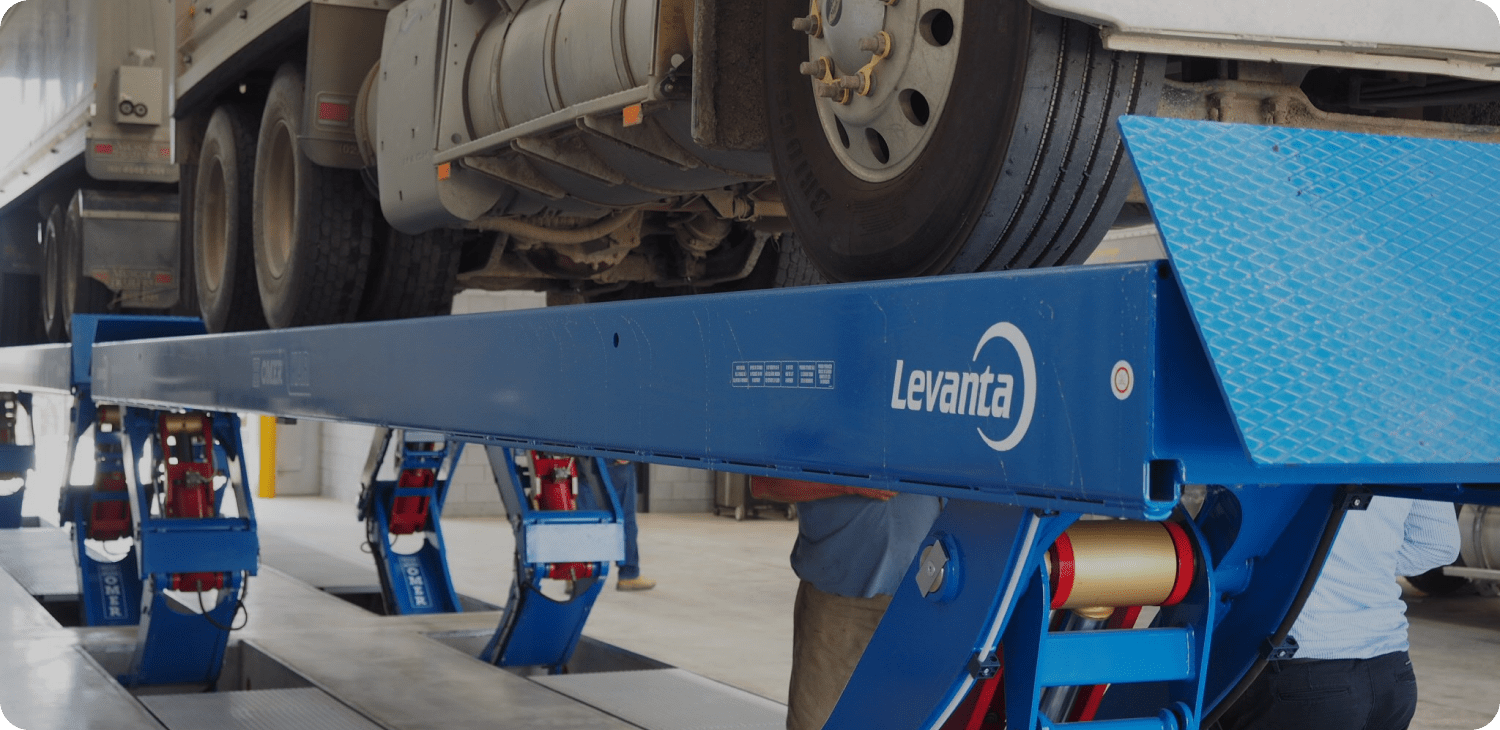
Should you carry out static or dynamic roller brake testing?

Levanta takes you through the issues for your workshop

The National Heavy Vehicle Regulator has advised that workshops must now use dynamic weight to assess the efficiency of a heavy vehicle’s braking system, and that both static and dynamic weight and deceleration must be shown on the report.

So which roller brake tester should you choose for your workshop? In this news post, Levanta’s brake testing experts run you through the issues to be aware of, and demonstrate which equipment you need to be able to perform the right kind of test once your RBT has been properly set up.

What’s the difference between static and dynamic testing?

  1. Static weight is the weight measured when a vehicle’s axle is first put onto the brake tester. It is in effect the dead weight once the wheels enter the roller bed and the vehicle is simply sitting there.
  1. Dynamic weight is the weight measured at the point where the test is terminated by either the wheels slipping by about 30% on average. (The actual slip range is 27% +/- 3% but let’s call it 30%.)
  1. Static deceleration is the deceleration of the axle or vehicle using static weight i.e. the weight measured when the axle/ vehicle is put into the rollers.
  1. Dynamic deceleration is the deceleration of the axle or vehicle using dynamic weight i.e. the weight as measured at the point of termination of the test.

Deceleration can be displayed as metres per second per second M/S/S or M/S2. Alternative metrics are kilonewtons per ton (kN/T) and % of Gravity (%g).

M/S2 and kN/T work out to be the same mathematical answer (i.e. 4.4 kN/T = 4.4 M/S2) whilst %g is a fraction higher (in reference to 4.4 M/S2 = 45 %g) due to the allowance for gravity.

kN/T is the easiest way to explain how it works, so we will use it in this example.

When the brakes of a vehicle are applied on a roller brake tester, they try to stop the wheel from turning and therefore also try to stop the rollers. The force that is generated by the brakes being applied is measured in kilonewtons.

Measuring axle weight for brake testing

The other factor required to get a measurement is the weight of the axle. As you have probably guessed, again there are two choices here: static weight and dynamic weight.

Reactive suspension is a suspension type (usually a trailing arm suspension) which reacts when used in a roller brake tester.

Due to the physics of testing using rollers, there is a tendency for the wheel or wheels in the rollers to be lifted out of the rollers and pushed backward.

With a traditional suspension there is minimal weight change, as the energy is dissipated within the axle. There is often a slight weight increase with traditional or steel sprung suspensions.

With trailing arm suspensions however the weight shift is more pronounced, with the weight being shifted to other axles on the axle group (a bit like a lever being used to lift the axle). This causes in some cases in excess of a 40% reduction in the weight (compared to static weight) at the point of termination of the test.

Using the example of kN/T the result is calculated thus: BF/Wt=Dec where BF is brake force (in kN), Wt is weight in tons and Dec is deceleration.

Why static and dynamic weight matters

Adding some actual numbers to this equation we get the following examples.

Total static weight of the vehicle = 10 tons, total brake force = 44kN. Total dynamic weight = 7.5 tons.

Using this, there are 2 possible results:

  • Static deceleration (BF/Wt=Dec) 44/10=4.4 kN/T and
  • Dynamic deceleration 44/7.5=5.87 kN/T.

As you can see the dynamic weight/deceleration generates a higher number of kN/T.

The requirements under the National Heavy Vehicle Regulator are for a minimum of 4.4 kN/T (or M/S/S). In this example the static deceleration would just pass, while the dynamic deceleration would provide a healthy pass.

The challenge of testing a trailer or light vehicle

There’s an extra challenge involved when you’re testing the brakes on a trailer or light vehicle. Of course, due to the nature of haulage, trailers need to weigh as little as possible in order to maximise the load that they can carry.

This creates a problem, as in Australia there is no requirement to have a load on the vehicle when it’s tested. As a result the trailers are usually very light and do not provide sufficient weight in the rollers to achieve an accurate result where static weight is used.

When put into the roller brake tester unladen, they are likely to slip early and terminate the test before the maximum braking force reading is achieved.

Due to the large number of trailers with reactive suspensions in Australia, the NHVR has instructed the industry not to use dynamic weight/deceleration alone in the evaluation of all vehicles over 4.5 tons Gross Vehicle Mass (GVM).

It is still a requirement to display static weight and deceleration on the reports as well – but dynamic weight is used for the evaluation.

What to consider when investing in a roller brake tester

When you’re weighing up different roller brake testers, you should consider the equipment’s ability to measure both static and dynamic weight, so that you can tick all the boxes when testing and make sure you meet NHVR requirements.

It’s also a good idea to consider future-proofing your investment to handle any potential changes that the NHVR may require in the future, such as:

  • Artificial load simulation
  • Air pressure testing

Here are some other resources on Brake Testers that you might find interesting:

Case study: Cleanaway Dandenong fitout including brake tester

How to set up your roller brake tester for best results

Heavy vehicle brake testing criteria update

A comparison of brake testers


Talk to Levanta for the right roller brake tester for your business

For advice on the best solution for your business, talk to the expert team at Levanta. The equipment we supply is capable of producing reports that comply with the NHVR’s requirements – as well as addressing many potential future changes.

Levanta are heavily involved in the industry:

To find out more about brake testers and how they can work with your vehicle workshop, get in touch with Levanta on 1300 577 541 or with your local office’s contact forms here.

How often should you perform a wheel alignment on heavy vehicles?

6 pointers on when to carry out this important maintenance

Ensuring the correct wheel alignment for your fleet can shave up to 3% off fuel costs and up to 20% off tyre wear – a figure that will have a significant effect on your bottom line.

That’s why it’s important to carry out wheel alignments as often as practical.

Whether you perform wheel alignments in-house or rely on external contractors, there are a number of key moments when you should consider carrying out an alignment.

In partnership with our supplier JOSAM, the Levanta team have put together this guide to when and why you should think about carrying out a wheel alignment on commercial vehicles.

1) When fitting new tyres

Contrary to popular belief, existing tyre wear cannot be fixed by carrying out an alignment. If a tyre is worn it cannot be retrieved, and an alignment is unlikely to prolong the tyre’s lifespan.

Essentially, it is pointless carrying out an alignment check on a worn tyre unless the wear is in its very early stages. Instead, you should carry out an alignment whenever you fit new tyres.

2) After changing steering components

Replacing steering components, drag links, track bars, ball joints and the like can all throw a vehicle’s wheels out of alignment. Counting threads can be wildly inaccurate, which means it’s better to replace steering components and carry out a full alignment.

You should also take particular care when adjusting or upgrading chassis lengths as this can seriously alter the vehicle’s Ackermann angles.

3) Prior to commercial HV inspections

The stringent criteria for commercial Heavy Vehicle inspections mean they often have to go through vigorous checks prior to being sent for inspection. It’s an ideal time to carry out a wheel alignment.

At an absolute minimum, you should carry out an alignment check at least once per year. Some clients have even benefited significantly from carrying out a three month check and adjustments, experiencing better handling and dramatically extended tyre wear.

4) During pre-delivery inspections

Often demanded by OEMs or fleet operators to optimise their new vehicle for Australian road conditions, pre-delivery inspections can be the perfect opportunity for a complete and accurate alignment check.

A pre-delivery inspection also gives your workshop a chance to pre-empt any tyre wear issues that could potentially be claimed on warranty.

You should also carry out a ‘post-break in’ alignment at between 20,000 and 40,000 kilometres or 3 months, whichever comes first.

5) In response to driver complaints

Quite often an off-centre steering wheel or ‘pull’ can be due to misaligned wheels. Driver issues or complaints can reveal vital information which, when combined with an alignment, can help diagnose issues.

While a driver’s issues won’t always be down to alignment, it’s a good chance to perform an alignment to at least identify or rule it out as a cause.

A properly aligned vehicle reduces driver fatigue and provides far safer and more reliable handling in the event of an emergency braking or manoeuvring event. What’s more, with wheel misalignment a combination or multi-combination (as we often have in Australia) becomes a very unwieldy vehicle at speed.

The sight of a swaying trailer and scrubbing wheels might be common, but when it’s your hard-earnt brand displayed on the vehicle it’s more than simply a performance issue. Your brand’s reputation could be at stake – not to mention the unwanted attention you may draw from the authorities.

6) Carrying out an alignment proactively

Many workshops carry out wheel alignments only once tyre wear issues have been identified. The problem with this approach of course is that it’s too late in most cases to save the tyres.

An alternative approach is to carry out wheel alignments proactively, to identify and rectify potential problems before they arise and cause damage.

Talk to Levanta for advice on heavy vehicle wheel alignments

Performing wheel alignments at least once per year – and preferably 3-4 times a year on all of the occasions listed above – will help to prevent any issues for your heavy vehicle fleet.

For more advice and information on wheel alignments for Heavy Vehicles, get in touch with Levanta on 1300 577 541 or with your local office’s contact forms here.

Choosing the best wheel alignment machine for your workshop

8 pointers for selecting the ideal wheel aligner

When you’re looking for the wheel alignment machine for your workshop, it’s important to have access to reliable information. We asked Levanta’s wheel service equipment experts to pass on their top 6 tips for choosing the right wheel aligner for your workshop.

1) Check that the aligner supplier offers comprehensive servicing

As a workshop manager you’ll appreciate that even the best equipment needs servicing from time to time, whether that’s a maintenance checkup or repairs.

Ask who will provide the necessary service for the wheel service equipment; what their typical response time is; and whether they can provide expert support to your location. 

2) Ensure the wheel aligner can be upgraded

Of course, you don’t want your brand new wheel aligner to become out-of-date too quickly. Make sure you check whether the machine can readily be upgraded as your business grows, and that you’re able to edit the specification when required by the operator. You may even be able to save the cost of a callout by ensuring the software can be downloaded via the internet.

3) Check that the alignment machine has an OBD2 real-time data interface

Most modern vehicles feature advanced driver assistance systems (ADAS) such as electronic stability control, anti-lock brakes, lane departure warning, adaptive cruise control, traction control and more; all of which can be affected by mechanical wheel alignment adjustments.

4) Look for a wheel aligner with cutting-edge software and tools

While it’s important to measure camber, caster, and toe are important, it’s equally important that the wheel aligner features software tools to make common adjustments easier. This feature can help reduce the amount of effort and skill needed to complete wheel alignments on common vehicles. 

5) Ensure the wheel alignment machine offers vehicle-specific procedures

Many OEMs have specific alignment specifications set for each of their vehicles. Look for a wheel aligner that stays up-to-date with available adjustments, and guides your technician through the correct procedure.

6) Find out whether you can you get training assistance for your technicians

Even your most experienced technicians will have to cope with servicing unfamiliar vehicles occasionally. They can save valuable time in this situation by knowing in advance what adjustments are available, and exactly how to use the wheel aligner for that vehicle.

7) Consider how efficient the wheel aligner is

It’s a fact that your business will only get paid for the wheel alignments you actually complete. Therefore, it makes sense to look for a machine that works as efficiently as possible.

Ask: How long does it take to get accurate measurements? How long does it take to complete the entire wheel alignment? These answers will be largely determined by the wheel aligner’s software and hardware.

8) Lastly, determine the expected ROI from the wheel alignment machine

Even though a wheel alignment machine may be one of the most expensive pieces of workshop equipment, it can also provide you with one of the fastest Returns on Investment. Before you lock in a particular model, think about the true time of return on investment by considering the factors we’ve spoken about above.

Talk to Levanta for advice on the ideal wheel alignment machine

The right wheel aligner can help improve your workshop business’s profitability and customer retention.

rFor advice and information on wheel alignment machines, get in touch with Levanta on 1300 577 541 or with your local office’s contact forms here.

How pit jacks & jacking beams revitalise your workshop service pit or lift

Levanta’s guide to pit jacks and jacking beams

Want to save money and increase the productivity of your old equipment? Levanta’s workshop fitout experts show you how.

The Myth

Because you have an older pit or lift in your workshop, no modern jacking beam or pit jack will be compatible.

The Fact

AC Hydraulic pit jacks and jacking beams can be used with existing pits and lifts – regardless of their age!

How can pit jacks enhance your workshop?

By retrofitting a highly efficient new jacking beam to your old equipment, you can increase productivity and save money. It’s an excellent way to get the results you need without doing a complete workshop overhaul.

Pit jacks to suit every type of service pit

The end frames on Levanta’s pit jacks come with hundreds of different configurations. This means that regardless of the design of your pit, we have the end frames to suit your rails – giving you the lifting power required for big jobs.

For unusual pit designs without rails, talk to us about a floor running pit jack. These have a HUGE lift height of 2.2 metres, which lets you get the wheels up off the ground so you can work quickly, efficiently and safely.

Get the right jacking beam for your current hoist

For wheel servicing while vehicles are still on your hoist, you need a jacking beam (or two jacking beams, if you’re planning to completely lift all the vehicle’s wheels to carry out wheel rotation or the like).

Like the pit jacks, the end frames on our jacking beams are completely customisable – so whether your four post hoist is two years old or 20 years old, they can be specially manufactured to fit it.

This customisation enables your team to work much more efficiently, as you can handle all wheel maintenance at a good working height, and utilise your lift better by performing oil changes AND wheel servicing.

It’s easy to retrofit jacking beams & pit jacks to your existing equipment

Simply tell our expert team what you need and they’ll customise the right solution to suit your workshop. Retrofitting really is easy and hassle-free – so there’s no need to continue working with equipment that hasn’t been optimised!

And because all AC Hydraulic products are designed and manufactured in Denmark (and supported locally by Levanta), you know they’ll be premium quality and will withstand the demands of your heavy vehicle workshop.

Need to give your existing workshop equipment a lift? Get in touch with the workshop fitout experts Levanta on 1300 577 541 or with your local office’s contact forms here.  

A comparison of brake testers

Which is best for your workshop business?

According to the NTARC (National Truck Accident Research Centre), 25% of all accidents are caused by speed, 12.1% by fire losses and mechanical failure, and 11.9% by fatigue. Importantly, each of these top three causes has contributory brake issues.

With the 2013 release of NTARC’s major accident report which states that brake problems can result in tyre fires and explosions, recommendations are being made that brake and tyre maintenance become a priority.

Coupled with the recent woes of one of Australia’s largest transport companies being issued with multiple defect notices for brake, wheel and suspension faults (taking 26 of their 80 strong fleet off the road), the major impact on company earnings and reputations cannot be ignored. And neither can the cause.

The different types of brake testing equipment

It’s clear to see that brake testing is an important part of your heavy vehicle fleet maintenance. But which type of brake tester will be best for your business? The Levanta team gives you all the information you need below.

As with almost any product, there are multiple types of brake testers available. The three main contenders are decelerometers, plate testers and roller testers.

1) Brake testing with decelerometers

The most common and cost effective piece of brake test equipment is the decelerometer. Usually found strapped to the passenger seat of the vehicle being tested, this equipment measures and records the inertial force of the vehicle as it decelerates from a pre-determined speed to a stop. Service brake speed is generally around 30kmh, with the park or emergency brake speed being 15kmh.

While there are plenty of different types of decelerometer available on the market, they all basically work off the same “g-force” principle. The transducer or pendulum is read to determine if the vehicle can develop enough brake force to theoretically stop the vehicle safely within a set range of distances.

Being relatively inexpensive and fairly compact, the decelerometer allows ease of use in most environments.

You have the option of printed paper tape to provide results, and maintenance is cheap and easy, with annual calibration ensuring the accuracy and legality of your testing. Decelerometers are fitted in the vehicle cabin, so mud and dirt is not an issue.

The disadvantages of decelerometers

Where decelerometers fall down is that they don’t provide information about individual wheel performance. This type of testing will also not show hidden faults like drag and cracked or warped brake drums or disks, as it doesn’t weigh the vehicle.

Motion is also a factor, as the vehicle must be moving for testing to be conducted. so there is potential safety issues due to the possibility of the operator getting distracted.

2) Plate testing of brakes

The second type of brake testing is called plate testing. While similar to a decelerometer in that it measures the inertial deceleration force of a vehicle being driven at a pre-determined speed, the plate tester is installed in a static position on the ground and the vehicle is driven on to it. The brakes are then applied while the wheels being tested are on the skid plates, allowing the reading of sideways movement of the vehicle wheel under braking as well.

Plate testers can be powered with an extra low voltage source (12vdc), which means minimal exposure to low or high voltage AC power. Plate testers also have fewer moving parts, principally the plate itself, and provide a more in-depth test, allowing weighing of vehicle axle (static) than decelerometers.

The disadvantages of plate testers

Like decelerometers, plate testers require the vehicle to be in motion to be tested. This can cause a greater level of distraction, as the operator must concentrate on keeping the vehicle at the correct speed, lining up on the plates, and then applying the brakes at the exact moment they hit the plates.

This is especially important for long vehicle testing such as road trains or B-doubles. Usually this would require other helpers to work with the operator, which can result in reduced consistency in some test situations.

3) Roller brake testers

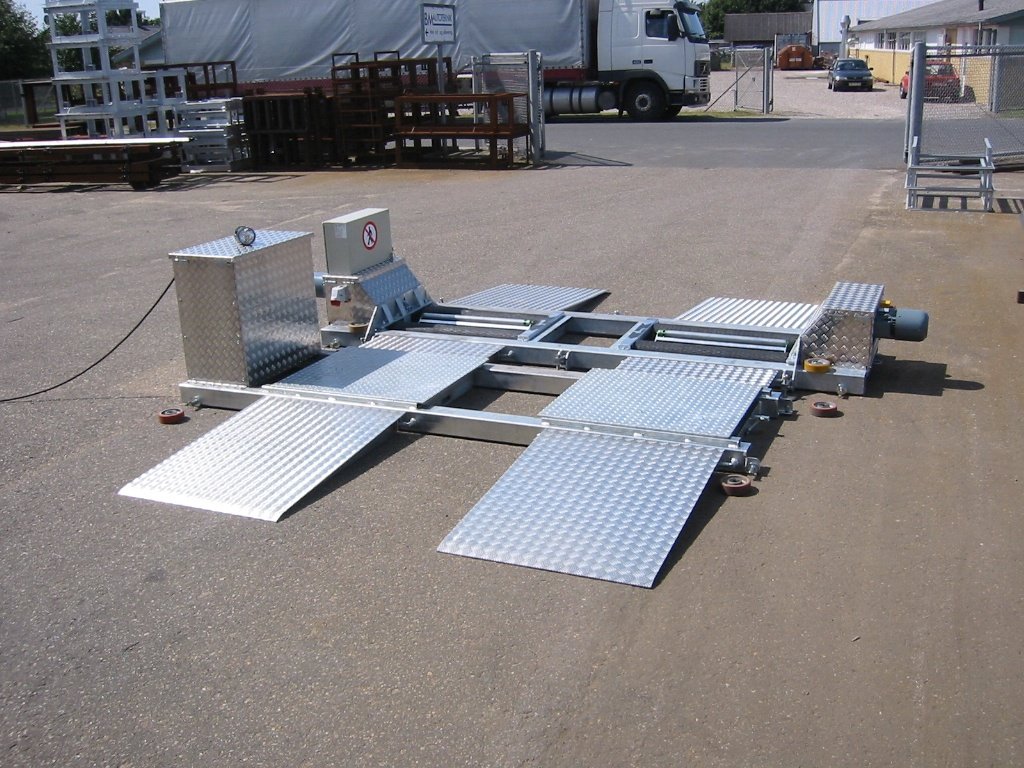
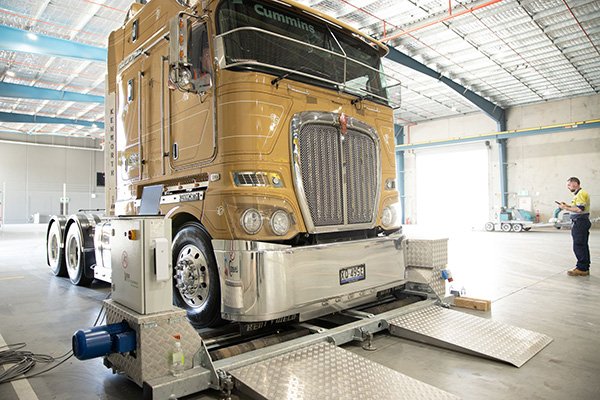
The final method is roller brake testing, in which vehicles are driven onto a set of rollers which are covered in a plastic medium infused with friction material. During testing the wheels are turned by the constant speed of the roller, keeping the vehicle static during the test.

Roller brake testing measures deceleration by means of torque force produced by the decelerations of the wheel against the rollers. This method produces the most consistent results across all axles. You can test one wheel at a time, review efficiency of service, and test parking and emergency brakes.

Roller brake testers can be configured for air pressure testing, ovality (warped or cracked discs/drums), and bind (rolling resistance). Additionally, some makes allow you to accurately test time lag, which can help reduce the likelihood of “jack-knifing”. Impressively, roller brake testing gives you the ability to match prime movers to trailers, maximising the vehicle’s balance and efficiency.

This style of testing offers greater safety, with the single operator system allowing control on some systems direct from the vehicle cab via remote control. There are also a number of options to enhance the system including speedo checking, play detectors, emission testers, headlight aimers and noise meters. With these accessories, the unit has the added advantage of forming the basis of a complete vehicle test lane.

The disadvantages of roller brake testing

While the roller brake tester sounds like the darling of the three methods, it’s not without its downsides. Due to the powerful drive systems, they generally require 3 phase power to operate and can be dangerous to operators if safety precautions are not strictly adhered to.

The weight of the mobile units can be prohibitive (weighing in a 1.2t for the brake tester). Installation can also present some challenges, with the in-ground units requiring some civil work to get the job done.

Choosing the right brake tester for your needs

Operation

Roller brake testers will measure the torque reaction generated by the vehicle brakes against a roller turned by a motor, while the plate brake testers have strain gauges attached to a plate supported on bearings, and measure the forces required to hold the plate, when a vehicle is braked on top of it. Decelerometers are placed in the vehicle and have a pendulum (more recently, airbag type accelerators) that moves when a vehicle is braked. The amount of ‘swing’ on the pendulum is measured to indicate deceleration during braking.

Safety

Roller brake testing is a comparatively safe method of testing, as the vehicle does not move during the brake test. Instead the rollers act as the road and turn under the wheels. With both the plate brake tester and the decelerometer, testing requires the vehicle to be driven and braked on the plates, usually within the confined space of a vehicle workshop or roadside. This could be a hazard to other road or workshop users.

Accuracy

Roller brake testers use the same braking surfaces to test all of the wheels, on all of the vehicles; ensuring accurate comparative tests. Plate brake testers use the same braking surfaces for all of the wheels, on all of the vehicles, while the decelerometer tests on-road so the braking surface can vary from very good to very bad, depending on conditions.

While roller brake testers test all vehicles at a consistent test speed, both the Decelerometer and Plate Brake Testers tend to test at variable test speeds; depending on how the vehicle is driven.

Adaptability 

Roller brake testers can test the entire range of every brake fitted to the vehicle, from zero to full braking, or wheel lock, consistently and repeatedly, without the influence of momentum or weight transfer. The plate brake testers and decelerometers cannot test the entire range of a vehicles brake successfully.

Decelerometers cannot test individual axles, plate brake testers can compare the balance of brakes across individual axles, while roller brake testers are able to consistently and repeatedly compare the balance of the brakes across individual axles.


Here are some other resources on Brake Testers that you might find interesting:

Case study: Cleanaway Dandenong fitout including brake tester

How to set up your roller brake tester for best results

Should you carry out static or dynamic roller brake testing?

Heavy vehicle brake testing criteria update


Power

Roller brake testers use external power for the brakes to work against, typically electric motors, therefore the time taken for the test can be controlled by the operator. On average brake tests applications last approximately 20-40 seconds. Plate brake testers and decelerometers use the vehicles inertia to provide the power to conduct the brake test, results have to be achieved in the time it takes for the vehicle to stop, brake testing results are typically taken in a couple of seconds.

Consistency

Roller brake testers are able to achieve consistent and repeatable results for brake tests for individual wheels to full brake effort or wheel lock up, while plate brake testers and decelerometers normally do not brake to full capacity, as this would be too dangerous. The brakes are tested to try to exceed a pre-defined deceleration and if this figure is exceeded then the brakes are deemed to be ‘good enough’.

Installation

The roller brake testers are compact but require sufficient room each side of the brake tester for the vehicle. Plate brake testers are the most space greedy, needing a large area for the plates and a suitable amount of room for acceleration and deceleration, including a safe overrun area. The decelerometer is the most space friendly, with no installation required for the vehicle mounted unit.

To give meaningful loading results with all three of the testers, the vehicle needs to be loaded to more than 60% of its carrying capacity, or in the case of the rolling brake tester, a simulated load applied.

To find out more about brake testers and how they can work with your vehicle workshop, get in touch with Levanta on 1300 577 541 or with your local office’s contact forms here.  
Heavy vehicle brake testing criteria update

Levanta helps bring your vehicle testing equipment up to speed

Compliance with brake performance criteria is one of the hottest topics in the heavy vehicle market at the moment.

The National Heavy Vehicle Regulator (NHVR) has updated the old NTC Heavy Vehicle Inspection Manual, which had not been updated since the late 1990’s. This meant the NHVR had inherited a manual that was outdated when applied to modern brake testing technology.

They are currently engaging with industry to ensure they get the next version of the manual to be even better, in particular with regard to how brake testing is done. As a result, Levanta has invested a lot of time assisting the NHVR to understand what is required to allow them to achieve useful roller brake test results.

While it is very encouraging that we are now much closer to a national approach to heavy vehicle inspection standards, there is still a lot of work to be done in understanding how best to utilise technology to assist in the inspection process.

The current state of play with brake testing

At the moment the National Heavy Vehicle Inspection Manual specifies pass/fail criteria. The NHVR will be undertaking a full and comprehensive review of the entire brake section of the manual in 2017. The roller brake testing method is being reviewed to ensure that vehicle braking systems are safe. This is reflected in the delay by some jurisdictions moving to the NHVR brake performance criteria. As an example, NSW RMS has delayed their adoption of the brake performance criteria in the manual until 31 January 2017.

The requirements within the manual specify an efficiency for a pass as 4.5kN/tonne. Under RMS Rule 501 this was 3.0kN/tonne. This is a significant increase, and some operators are experiencing difficulty achieving this requirement for some types of vehicles, in particular trailers with trailing arm suspension.

One old pass/fail point that is finally being reviewed – as a direct result of Levanta’s involvement with the NHVR – is the brake drag rule. This criteria requires that there must be no more than 1kN of “brake” drag on a driven axle, and no more than 0.5kN of “brake” drag on a non-drive axle.

A point that has been overlooked for many years is that a roller brake tester does not individually measure brake drag, but rather measures wheel end drag. The main contributors to wheel end drag are brake drag, bearing loading, tyre pressure and weight. The NHVR has recently released a Fact Sheet advising that a vehicle should not be failed as a result of brake drag unless it can be proven to actually be brake drag. Download the Fact Sheet here.

Levanta has worked closely with BM Autoteknik (the manufacturer of our brake testers) to develop a warning where wheel end drag is higher than it should be. This has been incorporated to assist users to identify high drag and provide a potential reduction in fuel and maintenance costs for fleet owners.

Reducing fuel usage and downtime for your vehicle fleet

A large component of fuel usage involves getting a vehicle moving. If there is unnecessary drag in the driveline, the engine has to work harder to not only get the vehicle rolling, but also to keep it rolling.

While it may seem to be a sensible point to be concerned about, brake drag is in fact not the biggest problem. Component failure is by far a bigger issue. High wheel end drag is very often a result of a wheel bearing being either incorrectly tensioned, or about to fail. Similarly, high wheel end drag can be as a result of component failure in the mechanical braking system such as sticking components or broken springs.

If these items can be picked up and rectified at a vehicle’s regular service, it greatly reduces the risk of those components failing in the field – and costing you money.

Park brake performance criteria raise questions

Another shortcoming Levanta identified is the park brake performance criteria. The rate of vehicles rolling away when parked and ending up in someone’s bedroom is high enough to be of concern. The NHVR manual only requires that a park brake gives a reading, or the vehicle lifts out of the roller bed.

Levanta and BM Autoteknik saw this as a major shortcoming, and again implemented a warning when the brake force of a park brake is less than 1.5kN/tonne. The NHVR is reviewing this and has indicated that a change may occur in the next version of the manual.

Regardless of what the change may be, Levanta will be able to update the testing software within minutes of any changes that are likely to be made. We have always had the ability to remotely access and re-program any brake tester that can be accessed via the internet.

This remote management capability also allows us to quickly have one of our technicians (or indeed a technician from the BM Autoteknik factory in Denmark) access your system and either provide advice to your staff, or make changes to the system.

Superior brake testing equipment for your workshop

BM Autoteknik equipment has been engineered for maximum reliability and uptime. This has been proven year-on-year by its record as one of the most heavily used brake testers worldwide.

As the inspection division of the British Ministry of Transport, VOSA operates in excess of 70 roller brake testers in their test stations across the UK – most of which test upwards of 100 vehicles per day. The average fail rate of the BM equipment used by VOSA is just 1-2 faults per year across the 70 machines. About 3 years ago VOSA started to scale back the government inspection stations in favour of private Approved Test Facilities which are experiencing similar availability rates.

We’ve found the reliability of BM Autoteknik equipment in Australia is of a similar standard. What’s more, in most cases, if a fault is reported Levanta can assess and rectify it within 2 hours (subject to site location).

All of this technology is aimed at reducing your maintenance costs and keeping your fleet on the road in top working condition and providing a return on your investment.


Here are some other resources on Brake Testers that you might find interesting:

Case study: Cleanaway Dandenong fitout including brake tester

How to set up your roller brake tester for best results

Should you carry out static or dynamic roller brake testing?

A comparison of brake testers


Partner with a supplier that knows brake testing

Levanta are advocating for some further sensible changes to the brakes section of the National Heavy Vehicle Inspection Manual. So when you’re selecting a partner to supply vehicle test equipment, it’s very important that that they have the ability to quickly modify their equipment to match the needs of your business to meet regulatory standards.

Another key consideration is to look for a partner that has the capacity and ability to work closely with staff doing the testing. As with most high tech testing equipment, there are some people who will pick it up and run with it, and some who will be frightened of new technology. It’s critical that your business has staff up to speed and realising the benefits of this equipment to the performance of your vehicle braking systems and your business.

This is why Levanta places so much emphasis on training and explaining how the system works – not only from an operational perspective, but also from the technical “nuts and bolts” angle.

To find out more about brake testing for your heavy vehicle workshop, call Levanta now on 1300 577 541 or fill out the contact form here.

Should you choose a pit or a hoist for your workshop?

Levanta mining industry project

What you should consider before you invest

As a workshop manager, you’re probably aware that any type of access option – whether that’s a pit or a hoist – will make a huge difference to your productivity, compared to working with the vehicle purely on the ground.

And it’s easy to see the potential ROI for your business. A workshop hoist or pit can reduce the time it takes to do a job from an entire day to just ¾ or ½ a day. If you look at the time they can save your technician (based on a $100,000 salary), a workshop hoist at (say) $50,000 will pay for itself in about 6 months!

If money was no object, of course you’d install both a pit and a hoist, to be ready for every servicing contingency. In the real world however, space and budgetary considerations usually mean choosing one or the other.

If you’ve ever batted this topic around in a room full of workshop technicians and managers, you’ll know there are many dearly held opinions. For this reason, it’s important not to make your decision based on just one person’s view – after all, employees do leave, and you don’t want to be left with a solution that’s not exactly right for your workshop.

Instead, you should select the pit or hoist that will give you the best productivity for your particular business. In this news post, the Levanta team offer some pointers on how you can select the right option for your requirements.

Is a pit or hoist best for a light vehicle dealership workshop?

If you’re mainly servicing car-sized vehicles, a pit will usually be unnecessary. The only exception could be if you wanted to establish a “drive-on customer experience”, where people actually wait in their car while it’s being serviced. A workshop pit is ideal for this application.

For most other car lifting scenarios, there are a range of different two post and four post hoists that will do the job admirably. 

One advantage of working on a hoist is that you can make use of whatever natural light is available. Unlike with a pit, you won’t need to waste time sourcing and setting up lead lights just to see what you’re working on.

Is a hoist or pit best for a heavy vehicle truck or bus workshop?

When deciding on the right option for your heavy vehicle workshop, it’s crucial to consider what you actually want to get done underneath the vehicles you service.

A workshop pit is ideally suited for carrying out regular service work, such as a basic grease and oil change, in a high volume workshop. It allows you to simply drive the rig on, complete the service, and drive it off again.

Opting for a service pit means you can also have two team technicians working on a vehicle at once – one below, one on top.

Of course, because a service pit is a “fixed” asset, once you install it you won’t have the option to move it to another facility should you decide to move your workshop.

On the other hand, if you’re doing a lot of heavy mechanical work – such as taking out an engine – it’s best accomplished with the help of a truck hoist.

Another factor is the type of vehicle you most often deal with. If it’s a single asset (for example a bus, coach, or truck), it’s hard to beat a knuckle lift where you can simply drive the vehicle on and lift it up.

By contrast, if you do a lot of work with “heavy combination” articulated vehicles (such as a B-double or road train), you usually won’t want to split it up, as it’s a prohibitively big job to disconnect all the trailers (and reconnect them after the service). In that case, there are a few different options.

You could use a series of column lifts (see our breakout box below) or you could use a 27 or 30 metre long pit and drive the entire combination on to be serviced in one unit.

Then there’s the ‘hybrid’ option of an in-ground lift that can offer you the best of both worlds. It gives you the versatility of being able to lift a whole rig on up to five lifting points, while still providing all the advantages of a hoist (such as working at ground level and making the most of available natural light).

———————————————————————————————————-

An alternative lifting option when space is at a premium

If your workshop doesn’t have room for either a pit or a hoist (for example if you’re working out of a small shed with just two bays) you might consider using column lifts.

A big advantage with column lifts is that, when you’re not using them, they easily wheel out of the way and don’t take up valuable floor space in your workshop.

Compared to a vehicle hoist, column lifts may be a bit slower to use – yet they still offer you a big step up in productivity, compared to working with a vehicle on the ground.

——————————————————————————————————–

Need advice on the right lifting option for your workshop?

As you can see, there are many different options available for servicing trucks or cars in your workshop. So before you decide on either a pit or a hoist, it’s a good idea to speak with Levanta’s workshop consultants. They can assess your existing setup – as well as any future expansion plans – along with the type and volume of workload you deal with, to advise you on the right option for your requirements.

For advice on choosing a pit or hoist for your light or heavy vehicle workshop, call Levanta now on 1300 577 541 or fill out the contact form here.

How can I effectively store special tools in my workshop?

Workshop furniture ideas for your business

Many dealerships have issues with storing the large volume of special tools that are required to perform vehicle repairs in their busy workshop. Your special tools are expensive, and at times, difficult to store.

That’s why you need an effective tool storage solution to maintain order, prevent loss, and ensure your tools and equipment are quickly accessible for the task at hand.

The best solution for workshop special tool storage

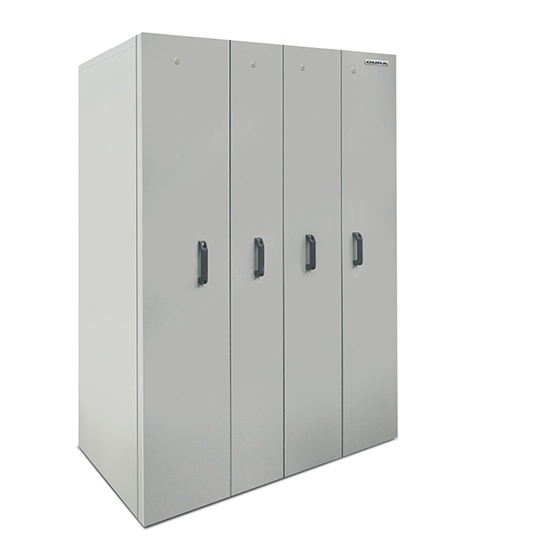
To address this issue, Dura Workshop Furniture have developed vertical tool cabinets that allow all tools to be hung in the storage system.

Each module pulls forward into the workshop, allowing clear visibility of the tools that are hung on both sides of the divider. Dura vertical tool cabinets are lockable to prevent unauthorised access to the tooling.

Dura Workshop Furniture is manufactured in the UK, comes with a 5 year warranty, and is specifically designed for automotive workshops.

Talk to Levanta about workshop furniture design to suit you

Remember – a well organised, clean and tidy workshop will help your business be more efficient, and help you attract and retain the best talent.

Levanta are the distributors for Dura workshop furniture throughout Australia and NZ. We can visit your dealership workshop to scope out your needs, and come back with a design that will address your tool storage issues. We’ll help you get your tool room organised and set for success.

Call Levanta now on 1300 577 541 or contact us online to see how we can design and build a durable workshop furniture fitout for your dealership.

What’s the difference between a concrete workshop pit and a steel prefabricated pit?

How to choose the best option for your heavy vehicle workshop

When you’re thinking of expanding your heavy vehicle workshop’s service capacity, service pits can make an excellent investment. Compared to vehicle hoists, service pits can offer your business greater vehicle throughput, improved safety, and far lower running costs.

But while choosing to install a service pit might be a “no brainer”, deciding between a concrete service pit and a prefab steel pit can be a little more complex.

While both options are ultimately workshop pits, there are some big differences in the way each is constructed – which can have a major impact on your business.

We took a look at a few of the issues to help you choose the right service pit option for your business.

How a concrete service pit is installed

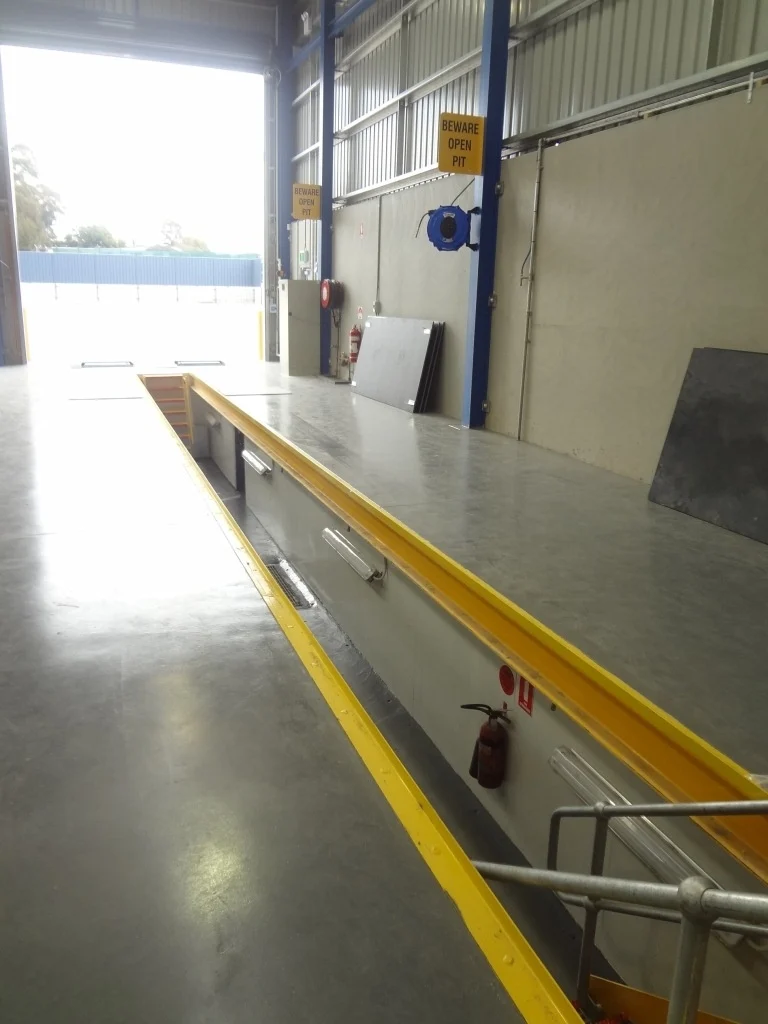
A concrete pit need to be formed up onsite in your workshop, which takes a considerably long time. The slab for the floor needs to be poured, then the side walls need to be either blocked up or formed up and poured with concrete.

This lengthy process can cause major disruption to the operation of your workshop.

Because the pit width is around 1400mm, but the pit opening is 950mm, there needs to be an engineered concrete slab to overhang the pit edge. It’s also very difficult to integrate the ventilation system and jacking rails into the concrete pit.

The advantage of a prefabricated workshop pit

By contrast, a Levanta steel prefabricated workshop pit is delivered to you completely finished and ready to install.

The prefab pit is craned into position, backfilled, and the workshop floor gets poured up to the edge of the steel pit. The jacking rails and reinforcement on the side of the pit are all engineered to give you peace of mind. It is even 2 pack epoxy coated inside and prewired to an isolator, which means one electrical connection is all that’s required to power the service pit up.

In around 4 days, the prefab pit will be completely operational and ready to use.

Consider the total costs of your workshop pit options

Although the raw structure of a concrete pit may initially seem a cheaper option, in fact when you include the following items – some of which are required for compliance –  it will end up being a more costly exercise. In addition, a concrete pit will take a lot longer to complete on site than a prefab pit, and is very labour intensive.

To ensure your Levanta prefabricated workshop pit arrives at your workshop site ready to go, you can choose to include the following extras:

  • Painting
  • Ventilation including an entry point into the pit
  • Explosion-proof lighting and brackets
  • Jacking rails
  • Alcoves in side wall of pit
  • Stairs and escape ladders
  • Services such as compressed air

The following diagram is an end elevation of a Levanta prefabricated workshop pit. It shows the construction detail, as well as how the prefabricated unit is installed in the ground.

Call Levanta now on 1300 577 541 to find out how we can design, build, and install a durable prefabricated service pit for your heavy vehicle workshop.